TIG Welding
What is TIG Welding?
TIG Welding is a manual welding process that requires the welder to use two hands to weld. What separates TIG welding from most other welding processes is the way the arc is created and how the filler metal is added! When TIG Welding one hand is used for holding the TIG torch that produces the arc and the other hand is to add the filler metal to the weld joint. Because two hands are required to weld TIG welding is the most difficult of the processes to learn, but at the same time is the most versatile when it comes to different metals. This process is slow but when done right it produces the highest quality weld! TIG welding is mostly used for critical weld joints, welding metals other than common steel, and where precise, small welds are needed.

TIG Welding Names
Knowing alternative names and abbreviations for TIG welding is important for anyone who is interested in getting a job as a TIG welder. Many companies may use alternative names when placing ads in the classifieds. Sometimes they may use alternative name on a written test to test your knowledge of the welding process. Besides that the alternative name means something to the process. As of today TIG welding is the slang term that is widely accepted and used. TIG stands for Tungsten Inert Gas Welding.
TIG weldings proper name is Gas Tungsten Arc Welding or "GTAW". This is the name the American Welding Society and other welding organizations refer to this process on their welding procedures. GTAW is also the abbreviation that welding engineers use to specify the welding process that is to be used on blueprints. On top of that when working on high pressure piping you could get sent home for a few days for not using proper terminology!
History of TIG Welding
When TIG welding was introduced around the 1940's Helium gas was the primary shielding gas used in process. The term Heliarc welding was the common phrase used back in the day and now is a registered trademark "GENUINE HELIARC", from what I know, it now owned by ESAB welding equipment! Why would this matter when you are job hunting or working in a shop? Most old timers and veteran welder's refer to TIG welding as Heliarc welding. I learned this very early on when I started to weld. I did not know Heliarc was also TIG welding! I thought when I went to welding school TIG welding was a new process I was going to learn. Wrong! Just like my former boss called the refrigerator the "ice box", they are both the same thing. When someone refers to TIG welding as heliarc, it's pretty safe to assume either they have a lot of experience, or apprenticed under a journeyman welder who has been around.
Why Use Tungsten to Weld
Since the name includes the term "Tungsten" and tungsten is what makes TIG welding possible, it is good to know what tungsten is! Tungsten is a very hard, slightly radioactive, and brittle metal. Its uses are limited compared to other metals. In TIG welding the tungsten is made into a non consumable electrode that is used to create the arc for TIG welding. Typical other uses for tungsten are in light bulbs, heating elements, and rocket engines. Basically any place that requires a very high melting point or the need to pass electricity at a high temperature is needed.
In the case of TIG welding the tungsten metal properties allows an arc to maintain a temperature up to 11,000 degrees Fahrenheit. A high melting point and excellent electrical conductivity keeps the tungsten electrode from burning up! The unique properties of tungsten alloy welding with a hotter arc then the actual melting point of the tungsten. The tensile strength of tungsten is an extremely high up to 500,000 lbs per square inch! Comparing it to commonly used steel with 36,000 lbs of tensile strength per square inch, tungsten is very strong! Although the metal is very strong it is also brittle! It is not hard to break a tungsten electrode with just a tap of a hammer.
How TIG Welding Works
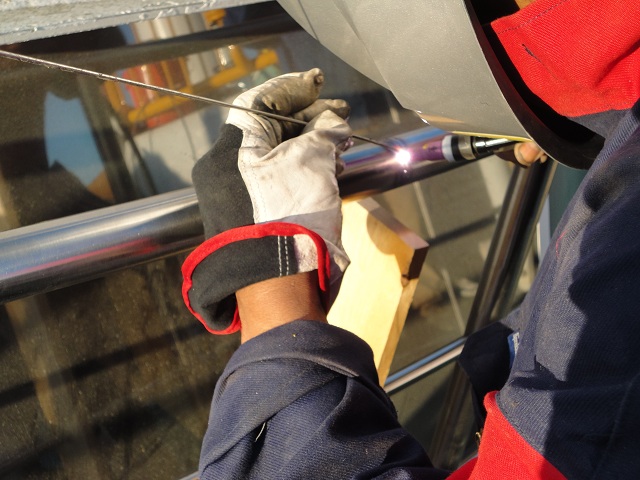
TIG welding requires three thing, heat, shielding, and filler metal. The heat is produced by electricity passing through the tungsten electrode by creating an arc to the metal. The shielding comes from a compressed bottle of gas that flows to the weld area to protect it from air. The filler metal is just a wire that is dipped by hand into the arc and melted. The way these three things come together is pretty simple. First the welder turns on the gas flow, many times by a valve on the TIG torch itself. The gas begins to flow and starts protecting the weld area from the air. The torch is held over the weld joint just far enough for the torch not to touch the metal. Then the welder presses a foot pedal and the TIG torches tungsten electrode starts an arc. Once the arc is started the two pieces of metal begin to melt by creating a puddle of metal. Once the puddle is established the welder with the other hand starts filling the joint by manually dipping a welding wire into the arc to fill the joint. Ultimately this process creates a single piece of metal.
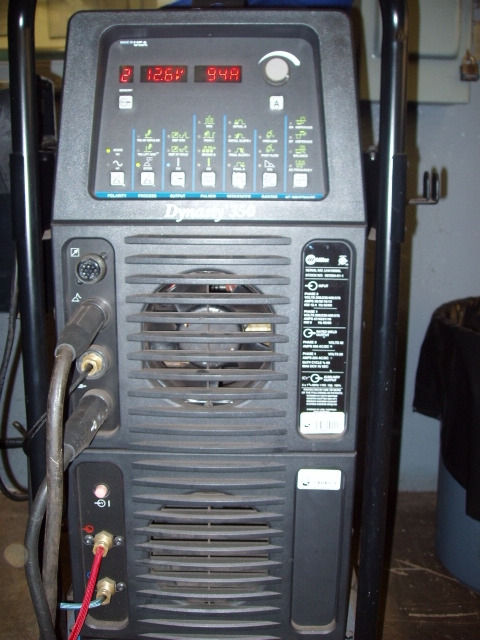
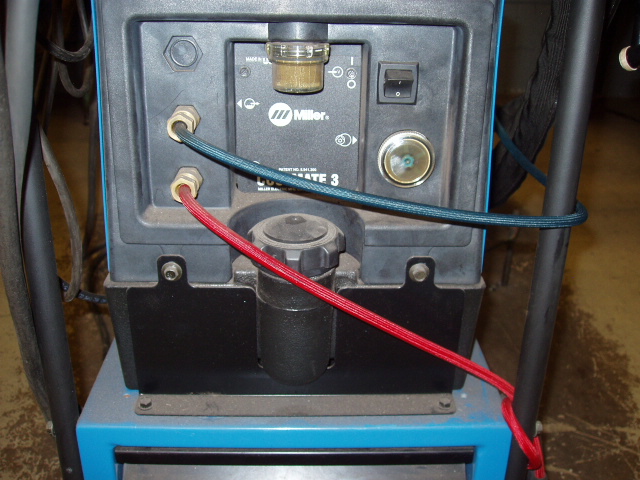
TIG Welder Power Supplies
TIG welding power supplies are usually Stick welding power supplies. The main difference between Stick welding power supply and TIG power supply are the bells and whistles TIG welding sometimes requires. A basic TIG torch can be added to a Stick welding power supply and it will weld fine. Both power supplies are constant amperage power supplies. Meaning they keep the amperage consistent and the heat settings are regulated in amperage. The voltage on these power supplies will vary depending on the length of the arc.
TIG High Frequency Start vs. Scratch Start
TIG power supplies many times come with a feature called a "high frequency start". This eliminates the need to physical strike an arc. Once the TIG torch is activated the high frequency start feature will can literally create an arc across a one inch gap between the TIG torch and the metal! This is done by creating a brief moment of high voltage that has the pressure required to jump the distance. It is just like a Jacobs's ladder used in science experiments. Once the arc is established the voltage drops and the amperage goes to what the machine is set at. This is very useful to keep the tungsten from getting contaminated and used up. The high frequency start feature helps the tungsten electrode live up to its designation as a non consumable electrode.
TIG Shielding Gas Pre-Flow and Post-Flow
Some common feature for TIG welding power supplies are pre-flow and post-flow feature. The pre-flow feature gives the shielding gas a pre-flow time to shield the weld area before the arc is started. The post-flow feature keeps the gas flowing for a set time after the arc is stopped to keep the weld are protected until the weld cools.
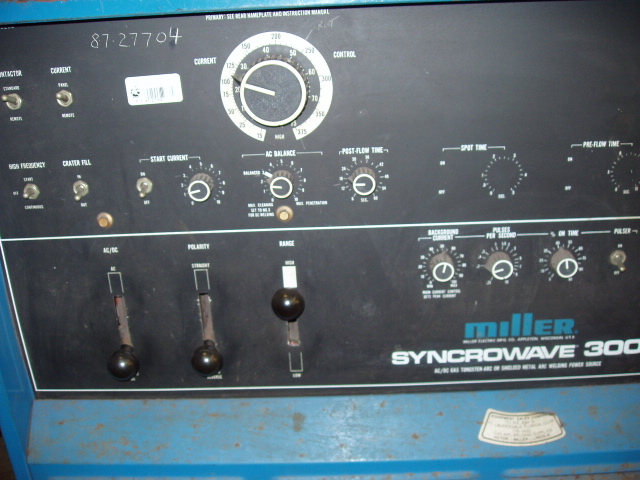
AC Waveforms Controls
Other features of TIG welding power supplies are frequency settings that help the characteristics of the welding arc. There are many ways to help the welding arc run smoother. Some of the features do this by using frequency ranges and or pulses of electricity to achieve the desired arc type. The biggest benefits of these features are they give the arc a cleaning characteristic. These settings are not very commonly unless welding aluminum or magnesium.

How to Convert a Stick Welder into a TIG Welder
It is very common in the field to use a Stick welder to TIG weld pipe. This is what most big companies use to TIG weld carbon and stainless steel pipe. I think Stick welding power supplies do a better job then TIG welding power supplies when it comes to heavy wall pipe.
The actual conversion is very easy and only requires an air cooled TIG torch and a bottle of Argon. For most welding applications there will be three steps involved to start TIG welding:
- First change the polarity to D/C Electrode (-) negative.
- Second take a air cooled TIG torch and hook it up to the stinger or electrode holder.
- Third take the gas supply hose and attach it to a regulator on a bottle of Argon.

That is all that needs to be done to convert a Stick Welder to a TIG welder!
TIG Welding Voltage Type and Welding Polarities
TIG welding just like Stick welding uses the same voltage types. The two Voltage types are:
- D/C Direct Current like the current from a car battery that only flows in one direction. That is from the (-) negative side to the (+) positive side.
- A/C Alternating Current like the current in your home. This current changes direction many times a second.
TIG welding just like Stick welding uses two polarity types when welding using Direct Current and they are:
- DC Direct Current Electrode (-) Negative. This means the electrode or welding handle is the negative side of the circuit and the electricity flows from the TIG torch to the metal.
- DC Direct Current Electrode (+) Positive. This means that the electrode or welding handle is the positive side of the circuit and the electricity flows from the metal to the TIG torch.
The difference the polarity makes has to do with how much heat is applied to the electrode. D/C electrode (-) negative concentrates about 2/3 of the heat onto the metal welded. This produces a deep penetration weld. D/C electrode (+) positive concentrates about 2/3 of the heat onto the electrode. This produces a shallow weld that is more suitable for sheet metal and at the same time gives the arc characteristics a cleansing action.
How DC TIG Welding Polarity Works
To better understand the flow of DC current you need to think of it in terms of water flowing. If you take a pitcher of water and pour it into a glass, the glass receiving the water gets most of the friction. So in this case the pitcher is the (-) negative side (loosing water) and the glass is the (+) positive side (gaining water). Basically the side is gaining water is the side with the most friction. In comparison to welding, this is the side most of the heat is concentrated on. That's exactly how D/C power works!
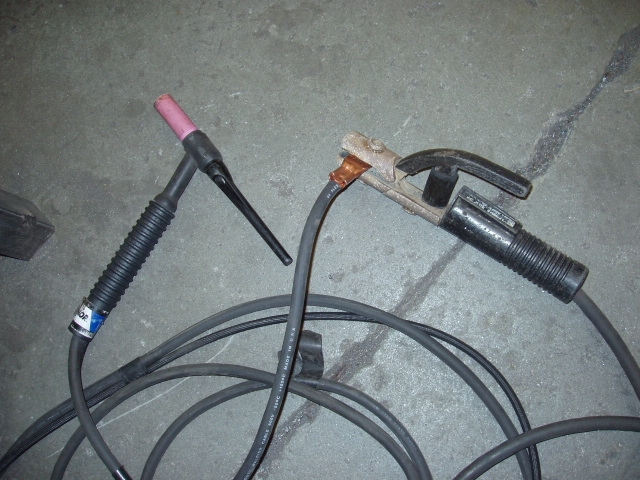
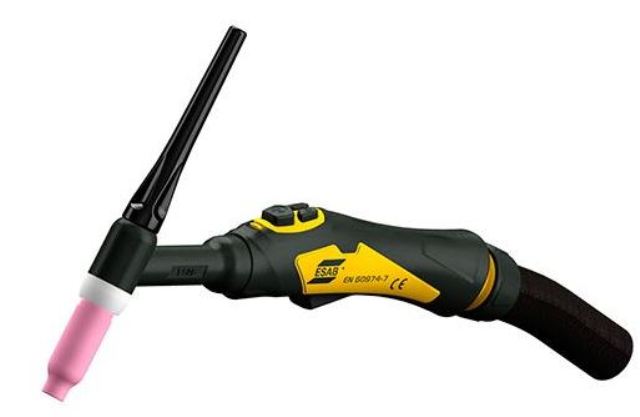
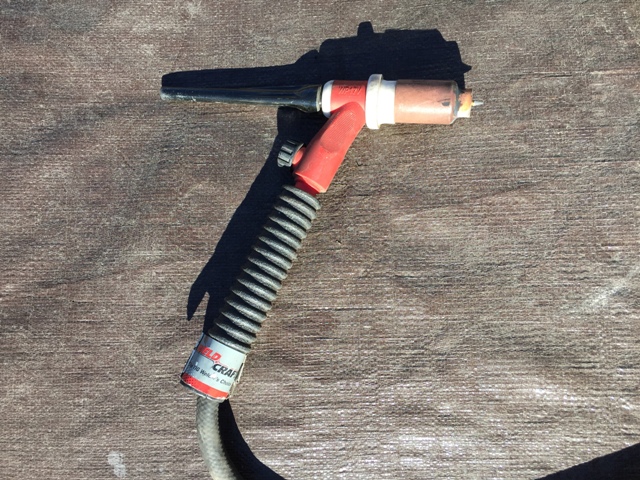
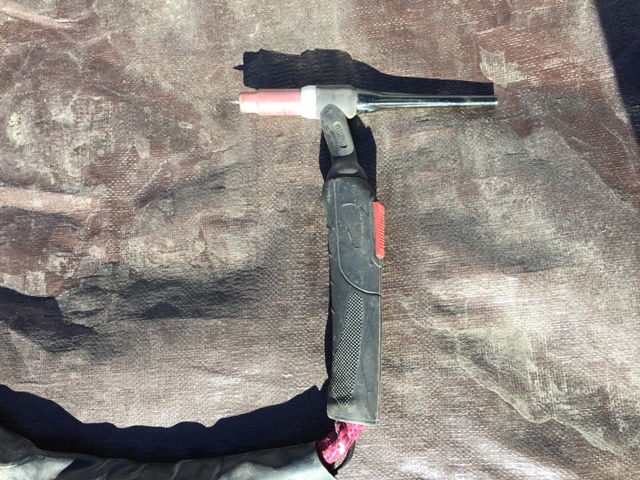
TIG Torch Types
When it comes to TIG welding there are two options for choosing a TIG torch!
- Air Cooled TIG Torches
- Water Cooled TIG Torches
Air Cooled TIG Torches
The first is an air cooled torch which is the least expensive and most practical. The down side is the air cooled TIG torch is it heats up quite a bit and much of the heat the arc produces is wasted. I literally am able to weld ten minutes with an air cooled torch before the handle gets too hot to hold!
Water Cooled TIG Torches
The second is a water cooled torch. This is the most efficient type of torch but it requires a water cooler and additional maintenance. Much like maintaining a radiator of a car.
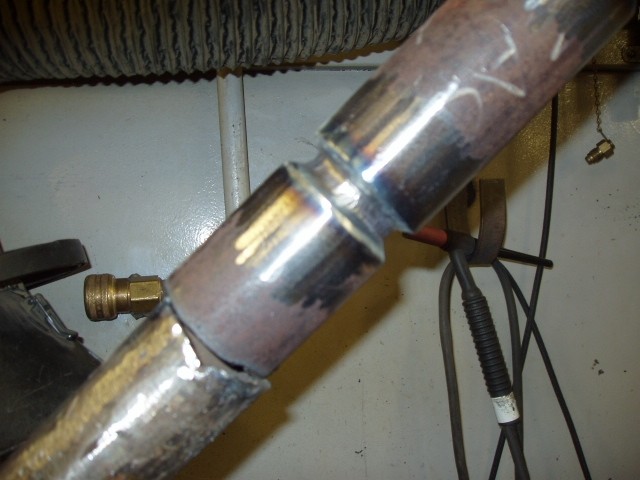
TIG Torch Water Coolers
If a water cooled TIG torch is being used then a water cooler will be needed. The water cooler is what cools the TIG torch. Inside the water cooler is a radiator just like in a car that the water passes through and a fan blows air through it to cool down the water.
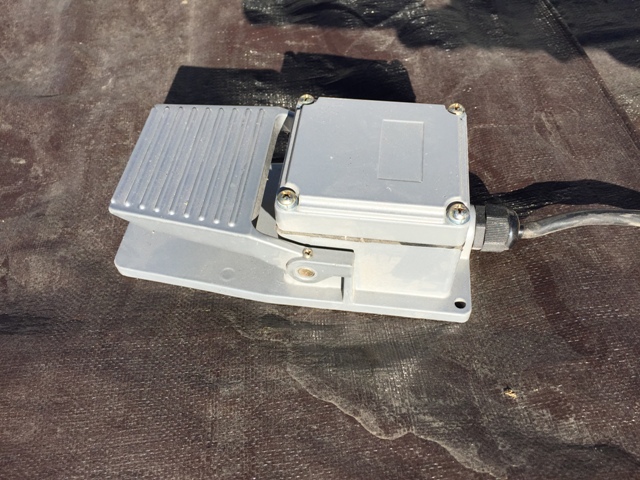
Remote Start vs. Manual Start
Once a TIG torch is chosen there are two options on how to start the arc, manual start vs. remote start. First there is the simple way of manually starting the arc. Just like a Stick welding once the TIG welding machine is turned on, so is TIG torch. The arc is started by manually striking the metal with the tungsten. The second option is remote start. Remote start features come in two different forms. The first being a switch that is on the torch and the second is foot pedal operated.
TIG Torch Hand Remote Start
Hand operated remote starts are very simple. All they are is a button that is taped onto the TIG torch that is simply pressed with a finger once you are ready to start to weld. What happens is the hand operated remote start cable is connected to the TIG welding power supply and it activates the high frequency start feature. It makes starting the arc easier and keeps the tungsten from getting contaminated.
TIG Torch Foot Pedal Remote Start
Foot operated or foot pedal remote starts are a bit more complicated. They control the high frequency start and at the same time control the amperage. Just like the gas pedal in your car, the further down you push the more power you get. Foot operated remote starts are mostly suited for shop work where the welder is able to sit. It is very difficult to weld standing with a foot pedal remote start. The upside to a foot pedal remote start is you have full control over the heat that you are welding with.
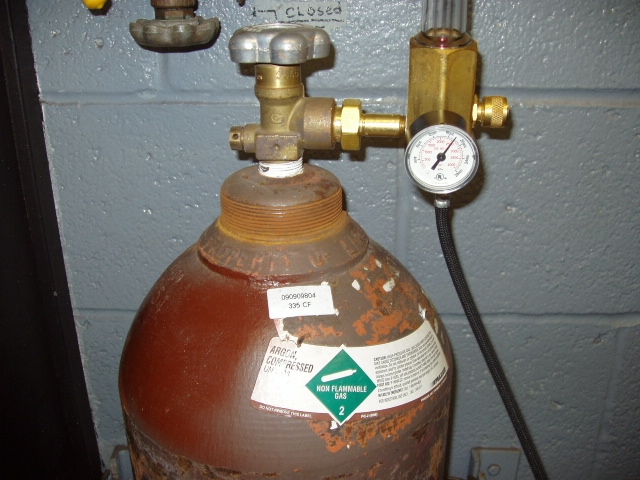
TIG Welding Shielding Gasses
Shielding gasses for TIG welding are used to protect the weld area from any air that will contaminate the weld. The two most commonly used gasses to TIG weld are:
- Argon / Ar (typically used)
- Helium / He
Since Argon and Helium are Nobel inert gasses they do not change the characteristics of the weld joint. What you weld with, is what you get. In some rare cases there are three types of mixture used. The first is Argon and hydrogen and the second is Argon and Nitrogen. The third mixture is Argon and Helium and that is typically used on thicker metals to get deeper weld penetration. In most cases pure Argon will cover almost all welding needs.

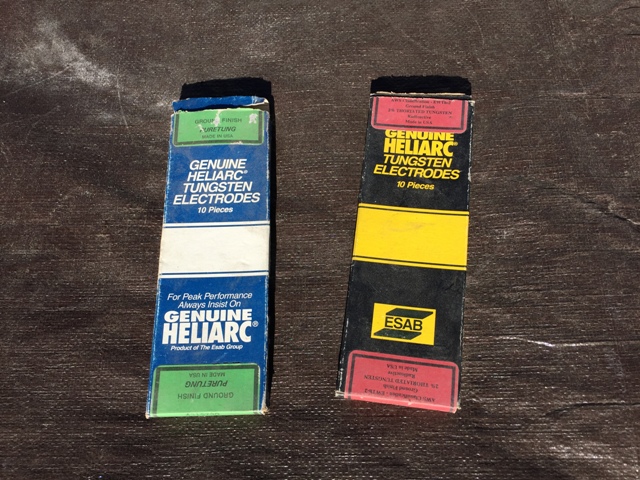
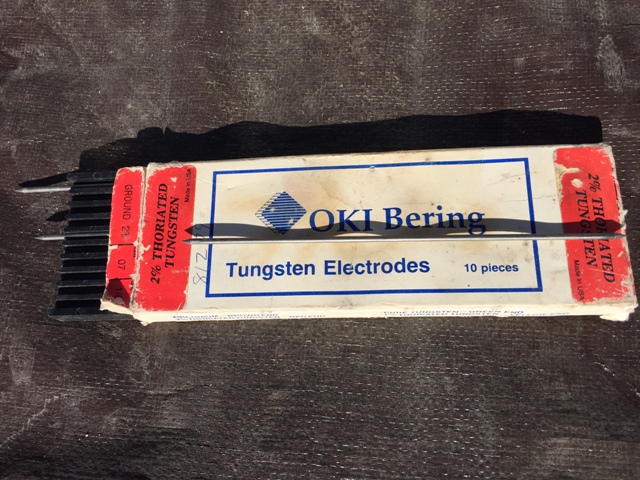
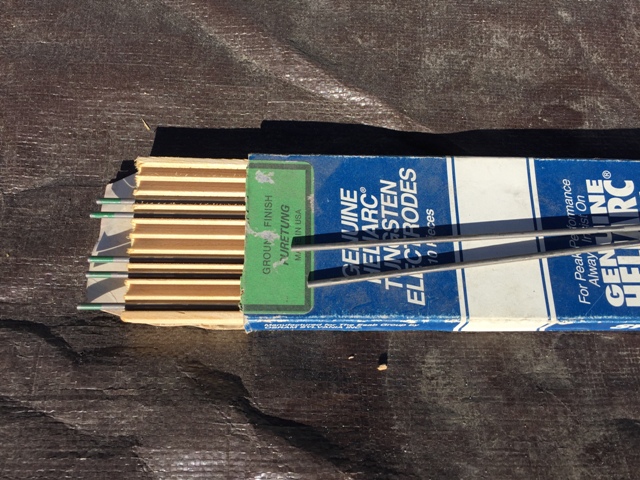
Tungsten Electrode Types
As the name states "Tungsten Inert Gas Welding" tungsten is the main ingredient in the electrode. What changes is there are very small percentages of other metals added to help create the desired arc characteristics. The common metals added to Tungsten are Cerium, Lanthanum, and Zirconium. In the real world the following Tungsten mixtures are the most widely used:
- Pure Tungsten, EWP
- 1/4 % to 1/2% Zirconium Tungsten, EWLa-1
- 1% Thorium Tungsten, EWPTh-1
- 2% Thorium Tungsten, EWPTh-2
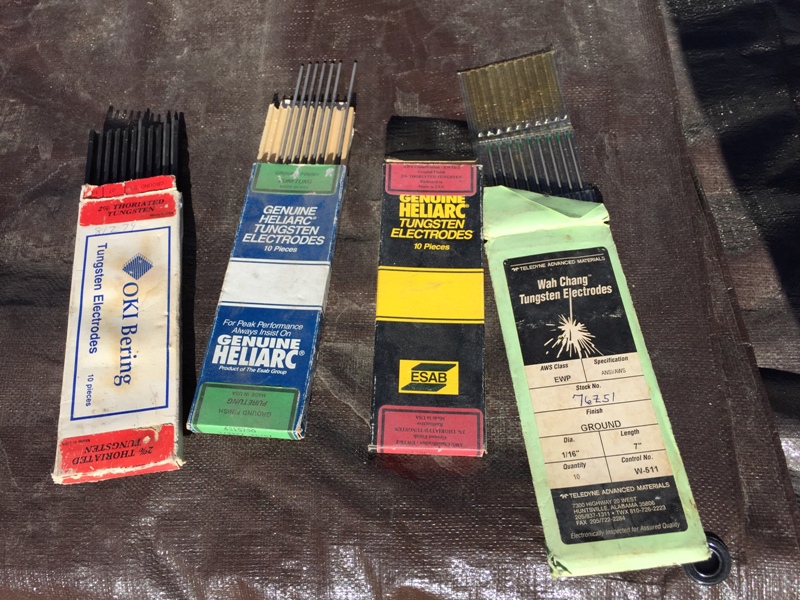
Pure Tungsten is used with A/C alternating current for welding aluminum and magnesium only. It comes with a green colored tip with an AWS (American Welding Society) classification code of "EWP" on the package.
Zirconium Tungsten has similar properties to pure Tungsten. Zirconium Tungsten comes in a mixture form ranging from ¼% Zirconium Oxide up to 1/2% Zirconium Oxide and the rest is Tungsten. It is typically used with A/C alternating current for welding of aluminum and magnesium. It comes with a brown colored tip and an AWS classification of EWLa-1 on the package.
Thoriated Tungsten is typically used with direct current and the polarity is (DCEN) electrode negative. The added Thorium Oxide helps the electrode carry more current at a lower temperature while making arc starting a bit easier. Thoriated Tungsten is used for welding most metals besides aluminum and magnesium. Some of the metals it works well on are carbon steel, stainless steel, chromium alloys, nickel, and most other ferrous metals. The percentages of Thorium Oxide added typically range from 1% to 2%. 1% Thoriated Tungsten comes with a yellow colored tip and has an AWS classification of EWTh-1 on the package. 2% Thoriated Tungsten comes with a red colored tip and has an AWS classification of EWTh-2 on the package.
Tungsten Electrode Diameters
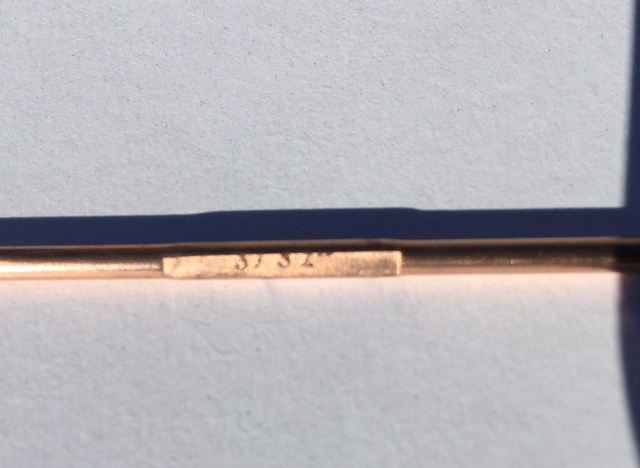
As with all electrodes there are choices in electrode diameters. With TIG welding the electrode size is not the most critical component of the process. As long as the electrode used stays within it amperage rating. What matters the most is the shape of the tip and that determines the arc characteristics. For most uses any size between 1/16 to 1/8 of an inch electrode diameter will do. The more common sizes on the market are:
- .04
- 1/16
- 3/32
- 1/8
- 5/32
- 3/16
- 1/4
Shaping Tungsten Electrodes
Since Tungsten comes in a rod form with a square cut end it needs to be shaped. Some of the tip shapes used in these electrodes are pointed, rounded, and tapered with a ball end.
Pointed Tungsten Electrodes
A pointed tip is typically used in welding ferrous metals like steel. The current used is DCEN (direct current electrode negative). What this does is allow the current to flow from the electrode to the metal. This allows the electrode to concentrate the arc temperature onto the metal. The pointed tip in this case will keep its shape by maintaining a higher arc temperature then the electrodes melting point. If the polarity were reversed the tungsten would likely start melting.
How to Shape and Sharpen a Pointed Tungsten Electrode
Shaping of a pointed electrode is typically done on a grinding wheel or Tungsten electrode sharpener. When using a grinding wheel it is best to use a fine grit wheel that is only to be used for sharpening Tungsten electrodes. There is a downside to using a grinding wheel. Since Tungsten is slightly radioactive you really do not want to inhale any of the particles! To sharpen the electrode point it upward while slowly and lightly rolling it on the grinding wheel between your fingers to obtain a round point. Oh yeah, don't wear gloves while doing this! The last thing you need is a glove to be pulled into the grinding wheel!


Shaping and Sharpening a Pointed Tungsten Electrode on a Sharpener
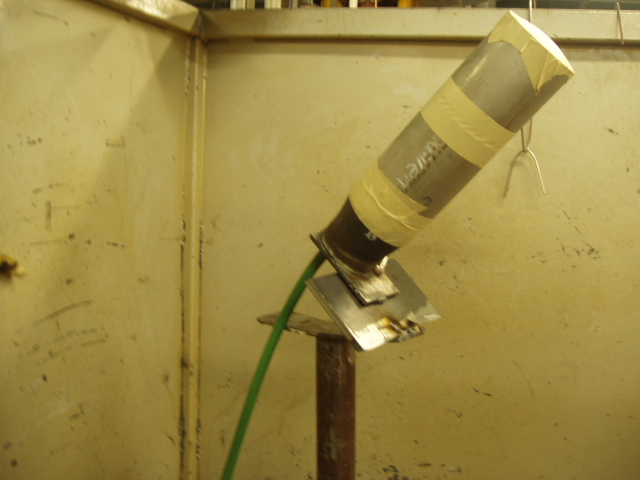
If you can afford it then there are tungsten sharpeners that work just like a pencil sharpener. They are much safer and produce a perfect point every time. All you do is put your tungsten in and it does everything else. The picture below is Tungsten Sharpener manufactured by Diamond Ground Tungsten Products.

Rounded and Tapered Ball End Tungsten Electrodes
Rounded or tapered ball end electrodes typically used for welding non-ferrous metals like aluminum and magnesium. The current used to weld these metals is A/C (alternating current). The rounded or tapered ball ended electrode helps by spreading the arc over a wider area of the electrode. To get a round or ball shaped end to an electrode, this it is done using DCEP (direct current electrode positive). To get this shape the Argon gas should be turned on and if possible start an arc on a piece of copper. What will happen is the tungsten will begin to melt once the amperage is high enough and then start to create a droplet at the end of the electrode. Once you get the proper size ball at the end of the electrode, stop the arc. After the shape is obtained turn the power supply back to A/C. In the case a piece of copper is not available simple use the cleanest piece of metal you can find to the job.
In some other cases a rounded or tapered ball end electrodes can be used for welding sheet metals with DCEP (direct current electrode positive). What this does is concentrate 2/3 of the heat on the tungsten electrode and prevent blowing holes in the sheet metal. The one thing to avoid when TIG welding with DCEP is too much current. Otherwise the tungsten will burn up!
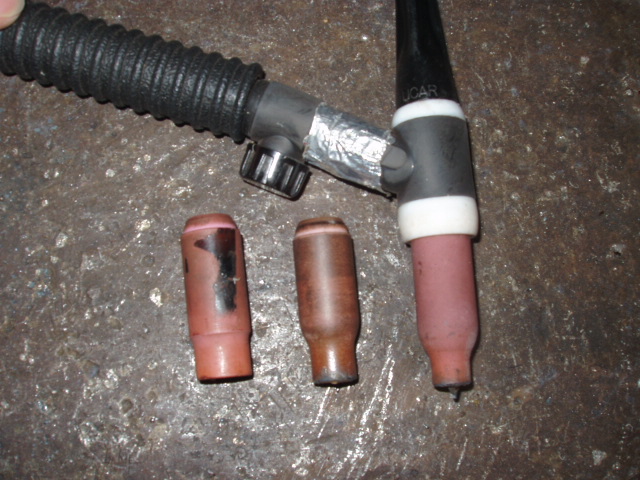
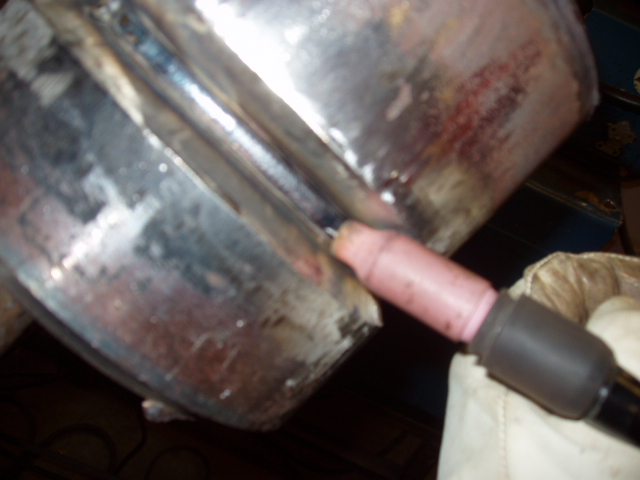
TIG Cup Sizes
Cup sizes come with a standard coding system. The coding system is pretty simple! For example a # 5 cup is 5/16 of an inch or a #9 cup is 9/16 of an inch size. The number used on the cup is like X/16. Whatever numbers used on the cup size always assume it the first number of an inch broken down into 16'ths of an inch.
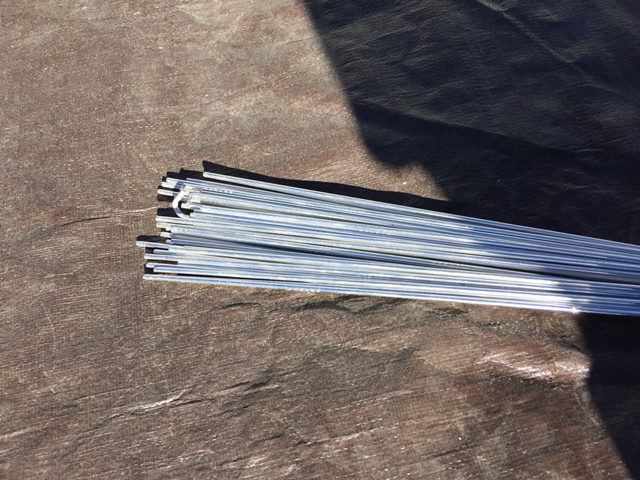
Filler Wire Designation
Just like any other welding process the filler wire for TIG welding has a designation coding system. Since TIG welding does not use any flux, the designations are pretty simple. In most cases you can use MIG welding wire. The only difference between MIG welding wire and TIG welding wire is the way they are packaged.
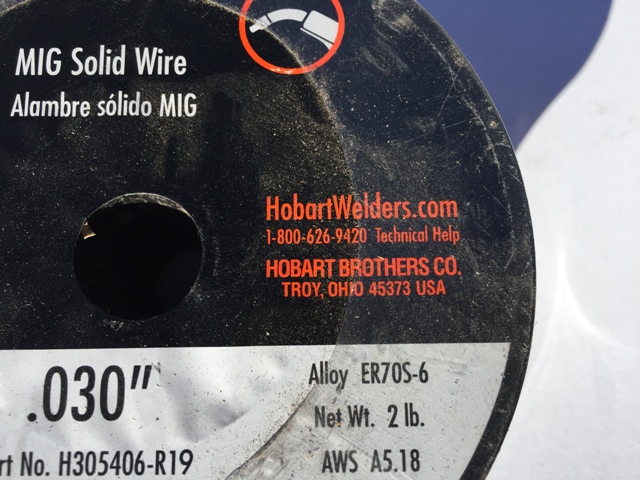
Typically TIG welding wire comes in 36" lengths. A common welding wire for mild steel is ER70S-6. The designation code is as follows:
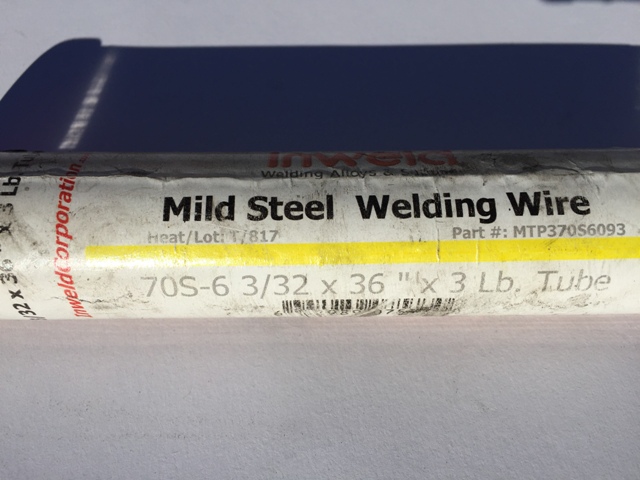
- ER– An electrode or filler rod that is used in either a wire feed or TIG welding.
- 70– A minimum of 70,000 pounds of tensile strength per square inch of weld.
- S -Solid wire.
- 6– The amount of deoxidizing agent and cleansing agent on the electrode.
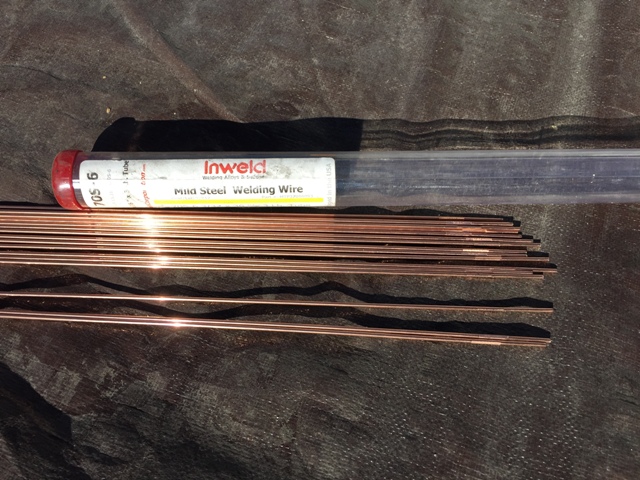
TIG welding Electrode wire also has the designation and size stamped on the wire itself. This is important because it’s easy to mix up different alloys because they look identical and weigh the same. One wrong electrode and you can ruin a weeks worth of welding. Getting caught on a high end job without the wire designation on your electrode will get you fired.

TIG welding wires come in many sizes and these are the more common diameters:
- 1/16
- 3/32
- 1/8
- 5/32
- 3/16
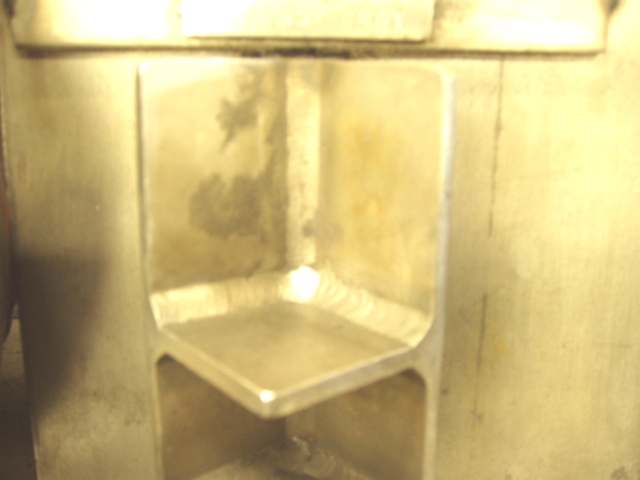
Joint Set-Up
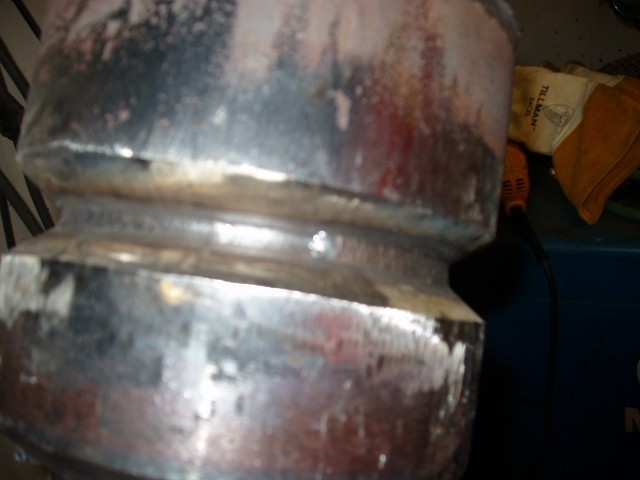
Joint set-up is extremely critical when it comes to TIG welding. There cannot be any rust, oxidation, mill scale, paint, oil, or anything that does not belong there except for the bare metal. All joints must be cleaned with a grinder or in the case of some metals like aluminum a chemical cleaner is used. One of my first jobs was welding aluminum in a factory and every piece to be welded got an acid bath before welding. TIG welding in my opinion produces the best weld quality but that weld quality depends a lot on a clean joint.
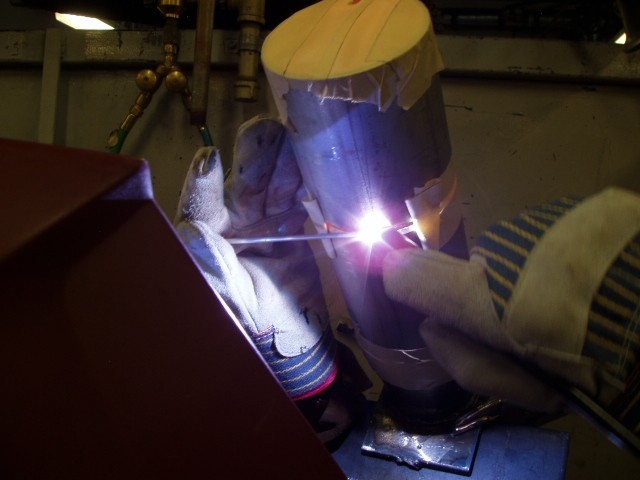
What is Purging a Pipe?
Purging is a common term when it comes to TIG welding pipe. What purging does is replace the air in a pipe with a gas that will not react with the root of the weld. Purging prevents weld oxidation or in pipe welder slag "sugar". When interviewing for pipe TIG welding jobs a common question asked is "How do you prevent sugar"? In other cases when welding a box can be filled with Argon to weld in it. Argon is heavier than air so it will fill a box or shape just like water. Argon can also be dangerous when the proper ventilation is not used. If you are in a sealed room and you have a bottle of Argon leaking, it will fill the room from bottom up, just like water would. Unlike water you cannot see or smell it. Once the Argon fills the room you will be breathing and suffocating at the same time, while not even knowing it! You just fall asleep and that’s the end of you. Typically Argon is used to TIG weld but since it is very expensive it is not used by itself to purge pipe. What most people use to purge a pipe is Nitrogen or Co2 gas.
Pipe Purgin
Purging pipe typically requires the use of math. In some cases like in shipyards they have charts that say what pipe size, length, CFH (cubic feet an hour of gas flow) is needed, and the time required purging the pipe. The other way is the canary method. Simply put a canary into the pipe and when the bird kicks the bucket you can be sure the pipe is purged of oxygen. I strongly advise against that method!
How to Purge Pipe
Before purging the pipe the open area of the pipe need to be sealed off. That also includes the weld area. This is done by taping to area and when it is welded the tape is pulled away in small sections. Once the area is sealed off you need to put a vent hole at one end of the pipe opposite of the side you have a tube filling the pipe. The location of the vent hole will vary depending on if you are using Helium or Argon. If you are using an Argon based filler gas you will want the vent hole at the top of the pipe because Argon is heavier than the air. If you are using a Helium based filler gas you will want the vent hole at the bottom of the pipe because Helium is lighter than the air.


There are three ways to figure out how much gas you need to purge a pipe before welding.
- Use a chart that has pipe dimensions, CFH and purge exchange rate times.
- Do the math on pipe volume verse gas exchanges.
- Use a Oxygen monitoring tool. You just insert the probe and it takes a reading of the atmosphere.
TIG Welding Machine Set-Up
When setting up a TIG welder there are two main settings. They are amperage and gas flow. Amperage settings vary depending on the type and thickness of the metal to be welded. You just set the amperage to a point that you are comfortable with how fast it melts the metal your welding. Gas flow rates also vary depending on draft conditions, cup size, and sometimes the position of the weld. The gas flow rate could range from 5 CFH to 60 CFH for a large cup and drafty conditions. When choosing the gas to weld it is almost always assumed that you will be using pure Argon.
Some basic guidelines for machine set-up are as follows:
- 1/16 Tungsten – Require an amperage rage between 50 to 100 amps. The recommended cup sizes are 4, 5, or 6. Gas flow rate should be between 5 to 15 CFH.
- 3/32 Tungsten – Require an amperage rage between 80 to 130 amps. The recomendated cup sizes are 6, 7, or 8. Gas flow rate should be between 8 to 20 CFH.
- 1/8 Tungsten – Require an amperage rage between 90 to 250 amps. The recommended cup sizes are 6, 7, or 8. Gas flow rate should be between 8 to 25 CFH.
Tig Welding Steel
Tig welding steel is very easy. The polarity typically used is DCEN (direct current electrode negative), Argon gas, and Thorium Tungsten. For welding steel and stainless steel the Tungsten needs to be shaped to a fine point.
TIG Welding Stainless Steel
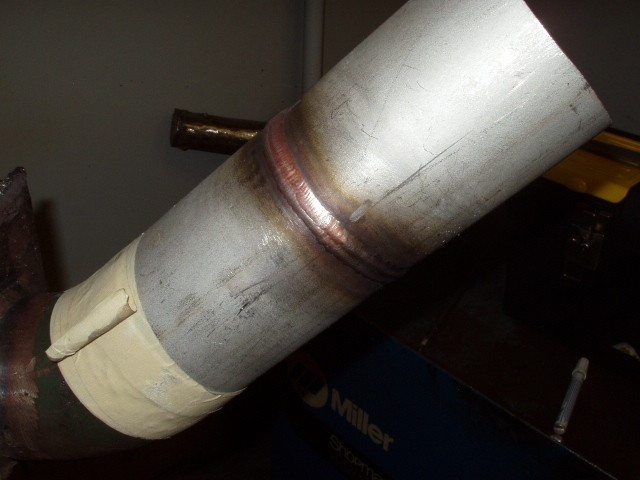
Stainless steel welds almost like steel. It does not take a lot of extra practice, uses the same type of tungsten, and Argon gas. The one exception is that welding stainless steel requires good gas coverage. Steel is forgiving when it comes to Argon coverage. Stainless steel sometimes requires the weld to be submerged in an Argon bath or if it is an open root weld the inside of the joint must be purged with a filler gas. One of the problems of welding stainless steel is it has a tendency to warp if too much heat is applied or the pieces welded are not braced properly! Distortion can be controlled by staggering the welds and bracing the weld area frequently. When stainless steel is TIG welded properly it will have a copper color to it. If you find the weld to be a gray or dark color that means either you are moving to slow or your heat is to hot.

TIG Welding Stainless Steel
Stainless steel welds almost like steel. It does not take a lot of extra practice, uses the same type of tungsten, and Argon gas. The one exception is that welding stainless steel requires good gas coverage. Steel is forgiving when it comes to Argon coverage. Stainless steel sometimes requires the weld to be submerged in an Argon bath or if it is an open root weld the inside of the joint must be purged with a filler gas. One of the problems of welding stainless steel is it has a tendency to warp if too much heat is applied or the pieces welded are not braced properly! Distortion can be controlled by staggering the welds and bracing the weld area frequently. When stainless steel is TIG welded properly it will have a copper color to it. If you find the weld to be a gray or dark color that means either you are moving to slow or your heat is to hot.

When TIG welding stainless steel, joint preparation is extremely important! The joint must be absolutely free of anything except clean stainless steel. If this is not done you will find the filler wire will not flow into the joint. When welding on a less then clean stainless steel joint you will find the filler wire won't want to stick to many parts of the joint. To avoid this it is best to hit the joint with a sanding disk or a file. This is true on multi pass welds too. If you put in one bead and then need to put in a second pass you also need to clean that area again before welding.
TIG Welding Aluminum
When TIG Welding aluminum there are a few steps needed to set up for it. First is the tungsten! The tungsten needs to be either pure Tungsten or Zirconium Tungsten. The tungsten also needs a ball shape at the end of it to spread the heat properly. The second is the current type and that is aluminum always welds with A/C (alternating current). Welding aluminum always requires a high frequency start from either a high production button or a foot pedal operated TIG torch. The main difference when welding aluminum versus other metals is how the puddle looks. Aluminum just has a shiny puddle that does not glow. It looks like tinfoil moving. When welding aluminum overheating of the metal must be avoided. It's real easy to keep welding and all of a sudden the whole weld area just drops to the floor.

TIG Welding Anodized Aluminum
When TIG welding smaller diameter aluminum tubing many people like to use a high production button. The purpose for the button is to bump the weld. What that means is basically spot welding around the pipe or tubing. This technique is typically used to weld anodized aluminum pipe. In the yacht industry many boats have tuna or marlin towers installed before they are sold. These towers are made of brushed or anodized aluminum to keep the pipe protected from the salt water. The anodized pipe has a coating that makes it very difficult to weld. Welding anodized aluminum requires two steps. The first step is to spot weld around the pipe and add filler wire. This weld is less than acceptable looking because the anodized coating has not melted properly. The second step is to spot or bump weld around the same weld without adding filler wire. What this does is melt the anodized coating into the weld better. After that the weld is painted with weld paint to protect it.

TIG Welding Exotic Metals and Alloys
TIG can weld almost any metal. This is possible because the main gasses used are noble inert gasses and their properties do not alter the weld properties. Most other welding processes use some type of flux or chemical additives to the filler metal. With TIG welding it is pure heat that creates the weld joint and that allows any metal that can be melted to be joined as long as the filler wire is compatible. Some of the exotic metals that are commonly welded are:
Copper Nickel "CUNI" and Copper Nickel Alloys
TIG welding copper and copper nickel alloys are typically done with pure Argon and sometimes Argon / Helium (75% Ar /25% He) gas mixture. In most cases the tungsten type used will be 2% Cerium with an orange color and an AWS classification of EWCe-2. In other cases 2% Thorium tungsten can be used. The most common welding current and polarity is DCEN (direct current electrode negative).
Many people who weld CUNI say it has a muddy feel to it. That is only true if you use too much heat and in that case the metal will turn very dark. When done right the weld will look very close to stainless steel with almost the same copper color to it. The best way to describe the feel and look of the puddle is a combination between stainless steel and aluminum. The puddle acts like stainless steel but is more fluid with a hint of shine or tin feel like welding aluminum. The catch with welding copper nickel and copper nickel alloys is that cold lap and roll are a common problem. Many time the weld looks like it has penetrated properly but in some places it is actually lacking penetration. It is very hard to detect cold roll and lap with copper nickel unless a die penetration test is done.
When it comes to open root welds on copper nickel there is a different technique used. What is done is you need to keyhole the root open on the joint! Not a joke! You strike your arc and then create a keyhole followed by dipping the filler wire into it. You just keep repeating this till the root is finished. It may sound difficult but the filler wire puts in a very smooth root with good penetration on the backside!
Magnesium
Magnesium is typically welded with pure Argon gas. The type of tungsten used is typically Zirconiated tungsten with an AWS designation of EWZr. In most cases the current will be A/C (alternating current) requiring a high frequency start.
Titanium
Welding titanium uses Argon gas and many times requires an Argon bath to be welded in. In many cases the gas coverage that the TIG torch gives is not enough. Titanium can be welded using 2% Thorium Tungsten with an AWS classification of EWPTh-2 and with DCEN (direct current electrode negative).
TIG Welding of Dissimilar Metals
One of the less common welding practices is welding of dissimilar metals. TIG welding has a lot of options when it comes to welding dissimilar metals. Most of these options depend on the design of the filler wire. In a few cases there are two steps to welding dissimilar metals but in the end theses metals can be joined. Some of the combinations of dissimilar metals that can be TIG welded are:
- Copper to Everdur
- Copper Nickel to Everdur
- Copper and Everdur to Steel
- Copper to Stainless Steel
- Hastelloy Alloy C to Steel
- Nickel to Steel
- Stainless Steel to Cast Iron
- Stainless Steel to Inconel
- Stainless Steel to Low Alloy or Carbon Steel
TIG Welding Techniques
When it comes to TIG welding techniques many of the standard pattern
still apply. What really changes is the way the filler rod is added and the fact that you need to use both hands at the same time. When adding the filler rod the filler rod should always be kept in the shielded gas area to avoid contaminating the filler wire. Most of the other changes have to do with how the arc is started. With a high frequency start, the starting of an arc is not an issue. With manual or scratch start there can be some trouble. The main problem with scratch start is that the tungsten may contaminate the weld and loose its shape in the process. The way most TIG welds are done is with a side to side motion of the TIG torch. As long as your amperage is set properly and you see the weld puddle wash into the sides of the weld you should be fine. Just like any other welding process there is not a single pattern or way to make a good weld. TIG welding works well in all positions on almost any metal. The only differences between a flat, horizontal, vertical and an overhead weld is how you mentally approach the task. Most of it comes down to a positive mind set and practicing! The end result is you want a smooth uniform bead that has washed into the joint properly.
Forehand vs. Backhand
When it comes to forehand vs' backhand welding it does not make much of a difference. Since TIG welding uses a filler metal added by hand, the arc is what determines the weld penetration. As long as the puddle washes into the metal smoothly it makes no difference how you travel. With other welding processes the angle of the travel is unforgiving! TIG welding on the other hand is very forgiving when it comes to torch angle and travel direction as long as the gas coverage is good.
Walking the Cup
Walking the cup is a welding technique that gives the welder much more control then free hand welding! When comparing freehand welding to walking the cup there is a huge difference in weld quality and appearance! A weld that was done by walking the cup is almost robot like with the bead pattern very uniform and consistent. This is because the cup of the TIG torch is always leaning on the weld joint and the arc length is kept the same. Arc length is the key when it comes to TIG welding bead appearance. To walk the cup you need to place the TIG torch cup on the weld joint and set the tungsten so that it is just above the weld joint. Then simply walk the cup and add or hold your filler wire in the joint. The cup gets its forward travel speed by moving the TIG torch handle in a way that creates a forward travel motion. There are many ways to walk the cup but the ultimately it keeps the welder's hands steady by providing a something to lean on at all times with a consistent arc length!

TIG Welder Troubleshooting and Common Problems
When TIG welding there is some common problems and weld defects. Most of these problems are easy to solve when you know what to look for. Some of the common problems include:
Weld Porosity
Weld Porosity can be caused by many factors. Some of the common causes of weld porosity are:
- Arc length is too long. Shorten your arc length.
- The joint is not cleaned properly. Clean with grinder or wire brush.
- Gas flow rate is too low or too high. In the event of the gas flow rate being too high the turbulence caused by the high flow rate will pull in air into the mix.
- The wrong cup size is being used. Change cup to proper size.
- Check for a draft coming into the weld area. If this is the case put up a barrier to stop the draft.
- The filler rod is oily, dirty, or corroded. Try a new filler rod.
- The shielding gas is contaminated. Change the gas.
- The wrong gas is being used. In most cases pure Argon is the proper gas type.
- The cup or is not tight enough. Check all TIG torch parts for tightness.
- The hose lines may not be tightened or have a leak. Check connections for tightness or use soapy water to find any leaks.
Tungsten Deteriorating or Unstable Arc
Tungsten deteriorating or an unstable arc is typically due to the following causes:
- Gas flow is too low. Raise gas flow rate.
- Arc length to long. Shorten arc length.
- Wrong gas being used. Change the gas.
- Tungsten is contaminated. Break and reshape the tungsten.
- Tungsten contacted the puddle. Clean tungsten and shorten stick-out.
- Tungsten electrode diameter is too big or small. Replace tungsten with proper size.
- Wrong polarity. Change polarity or voltage type.
- Amperage is too low. Raise amperage.
- Ground clamp is not contacting properly. Clean ground connection.
- Weld metal is not cleaned properly. Grind or wire brush weld joint.
- TIG torch connection is loose. Tighten TIG torch connection at power supply.