Stick Welding
This page is all about stick welding and it is broken down into three sections:
- Basic overview of stick welding terms, common questions, basic equipment and how stick welding works.
- Welder safety, joint preparation,
electrode selection and equipment setup. - Stick welding techniques and basic guidelines for different metals.
What is Stick Welding?
Stick welding is technically defined as “Shielded Metal Arc Welding”. The term “stick welding” is a common slang term that the welding industry has adopted becuse the electrode that welds the metal comes in the form of a “Stick”.
The simplest explanation of how stick welding works. Stick welding is a form of welding that uses electricity to melt a metal filler rod/electrode/stick (electrode is the proper term) that melts both the metal joint and electrode all at once to fuse two pieces of metal together and fill the joint with filler metal at the same time.
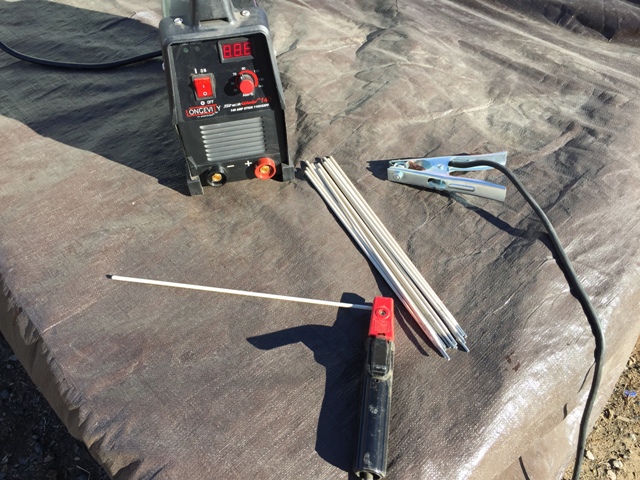
Stick Welding Equipment
Stick welding equipment is the simplest of all the electrical arc welding processes. A Stick Welder has four parts:
- A constant voltage (CV) power supply/Stick Welder.
- Electrode holder/rod holder.
- Ground clamp.
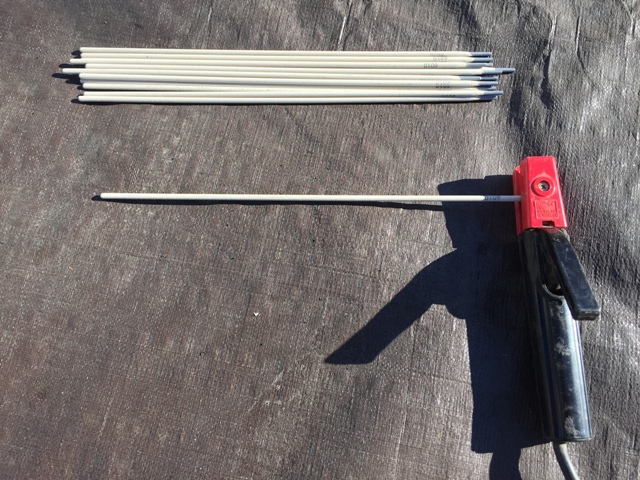
- Stick welding electrodes/rods to weld with.
Is Stick Welding AC or DC?
Stick welders can be both AC and DC power depending on the electrode type used. For most heavy industrial jobs or hobbyists a DC power supply can do just about anything. It’s very rare to use AC. Stick welding power supplies are constant voltage or CV and that means the voltage stays the same while welding and the amperage fluctuates depending on your arc length when welding.
How Much Power or Amperage Do I Need in a Stick Welder?
A 140 amp Stick welder is more than enough power to weld just about anything! Many people get caught up in the manufacturer’s “maximum metal thickness” propaganda and end up buying a large welder. It’s just a sales tactics! I have worked in shipyards, power plants and heavy fabrication shops and it is rare to need more than 130 amps. At 130 amps you can weld unlimited thickness metals. You just not going to weld a 1 inch plate in a single weld! We weld 1 inch thick ship hulls with just a 120 amps.
What is the Difference Between Stick, MIG and TIG Welding?
Stick and TIG welding use the same Constant Voltage power supply and a Stick welder can be adapted to TIG Weld just by adding a torch set-up.
MIG welding uses a “Constant Current” or “CC”power supply and does not work well for Stick and TIG welding. Plus MIG and Stick need a bottle of shielding gas to weld and MIG welders need a wire feed system instead of a single electrode to feed the weld joint.
How Much Does Stick Welding Equipment Cost?
It all depends on what brand you choose, what you need it for and what you are willing to spend!
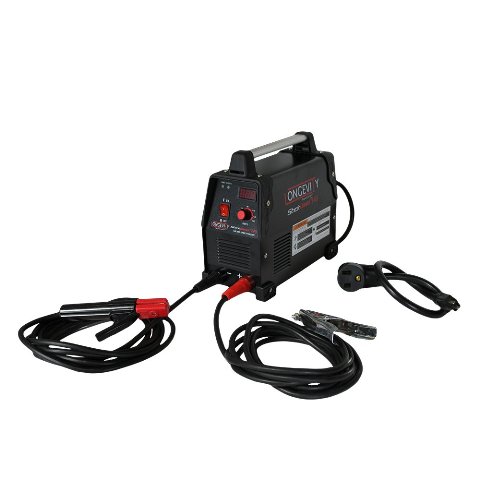
A good entry level/professional stick welder like the Longevity StickWeld 140 in the picture below will run under $300 USD or about $25 a month financed, it’s very portable and weighs only 13 lbs, works off 110 or 220 volts and can do whatever you need. That same setup can also be converted to a TIG welder that can weld steel and stainless steel just by adding a TIG torch and bottle of shielding gas.
Higher end stick welders can run over $10,000.00 USD but those are used for heavy industrial manufacturing and most people and businesses don’t need half the bells and whistles or that type of power. Below is a list of quality welding equipment manufactures. On a side not never buy Harbor Freight welders or any cheap brands! No matter how good of a welder you are it’s going to be hard to make a good weld!
- Longevity Welder – Excellent entry level equipment that also crosses into professional grade.
- Everlast Welders – Another excellent entry level welding equipment manufacture that crosses into professional grade.
- ESAB – One of the best industrial quality welding equipment manufactures that is as high end as it gets but its not cheap.
- Miller – Another excellent industrial quality
brand and their equipment can do just about anything but the price tag is also high. - Lincoln Electric – They have been around a long time and they make good industrial grade welding machines well know for pipeline welding.
How Long Does it Take to Learn to Stick Weld?
It all depends on what you want to do? If you are just looking to do general repairs and to get started I would say 5 hours of practice would get you to the point of fixing a broken tractor fender or welding a shelving system. Your weld won’t look good and they probable be really rough but it should hold.
If you want to work as a entry level welder at least 500 hours of training. Intermediate level welding takes around 900 hours of practice. If you are going for a career and want to make decent money welding pipe expect 1,200 hours plus learning curve or 18 months to two years of training.
If you are intrested in training you can find local welding schools here.
What Can I Weld with a Stick Welder?
Stick welders work best on thicker metals and are not a good choice for thin sheet metals. They are excellent for fabrication of structural steel, fixing farm equipment, tractor repairs, ship building, power plant construction, welding pipe and any metal 1/16 or thicker. If you are dealing with sheet metal get a TIG or MIG machine! You can stick weld:
- Steel
- Stainless steel
- Nickel based alloys
- Chrome
- Stainless steel to regular steel
- Aluminum (not the best choice but it does the job)
How Does Stick Welding Work?
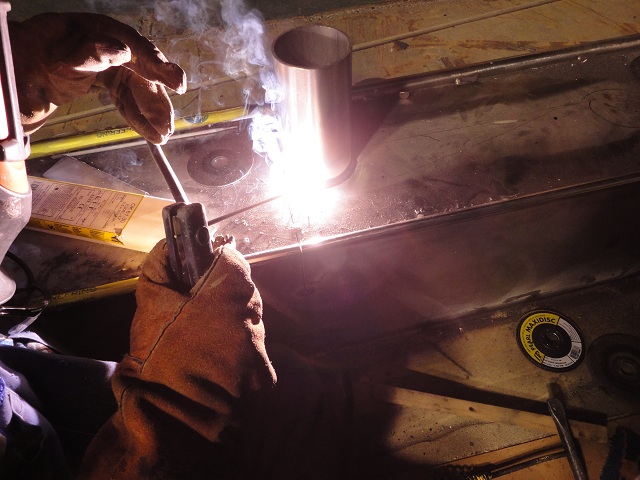
Welding works like this. First you need to hook up your welding rod holder and ground clamp to the welding power supply. Then hook up the ground clamp from the welder to the metal. Finally you put a welding rod into the electrode holder and strike the area like a match where you want to start to weld. The rod or electrode start burning and depositing metal into the joint and you have a weld.
What happens here is the electricity from the welder passes through the rod and arcs at the point of contact creating a temperature of up to 7,000° F. Now the rod begins to melt and the coating around the rod creates a shield from any oxygen that will contaminate the weld. This is why stick welding is technically called SMAW/shielded metal arc welding. It's a shield around the metal electrode that is arcing. As you move the rod over the joint it keeps melting (more like a spray of metal transferring to the joint) by creating a crater and filling the joint.
Basic Welding Safety
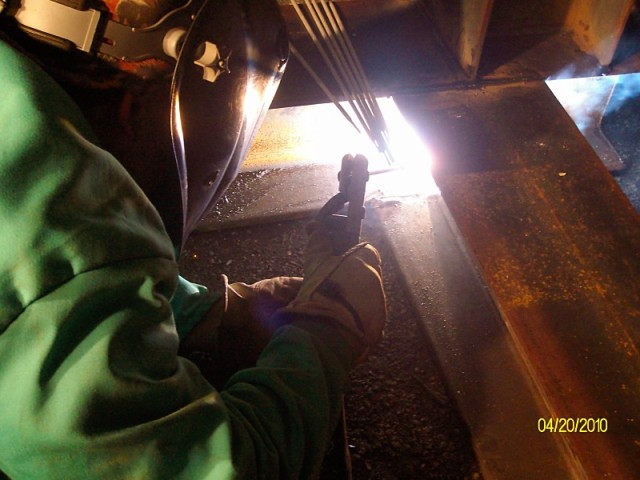
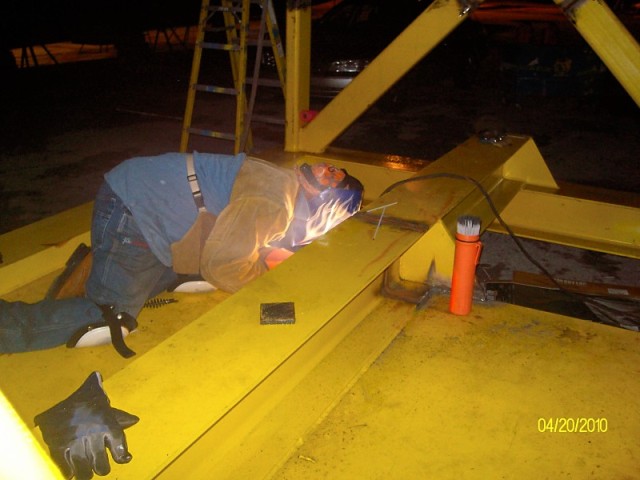
Unlike many other trades where safety is preached and where accidents and injuries may happen, mishaps in welding are basically unavoidable if safety isn't followed to the letter! Welding without proper safety equipment will seriously mess you up without exception… And it can even kill you! Take this seriously
The first thing you will need to do is get the proper clothes and protective equipment. Also, you may need a ventilation fan if you will be in a confined area. Welding fumes are toxic! The basic equipment you need is:
- Welding helmet
- Long sleeve cotton shirt or leather welding jacket.
- Leather welding gloves.
- Cotton pants or any non flammable materials.
- Leather boots or fire proof shoes.
- Respirator or ventilation fan if ventilation is a issue.
- Fire extinguisher if flammable materials are around.
Even with the right safety equipment (also known as PPE or personal protective equipment) expect to get your clothes caught on fire and burns from sparks and molten metal. One of the biggest mistakes is wearing sneakers! Sooner or later falling molten metal will burn a hole through the top and all you can do is take the burn until it cools down!
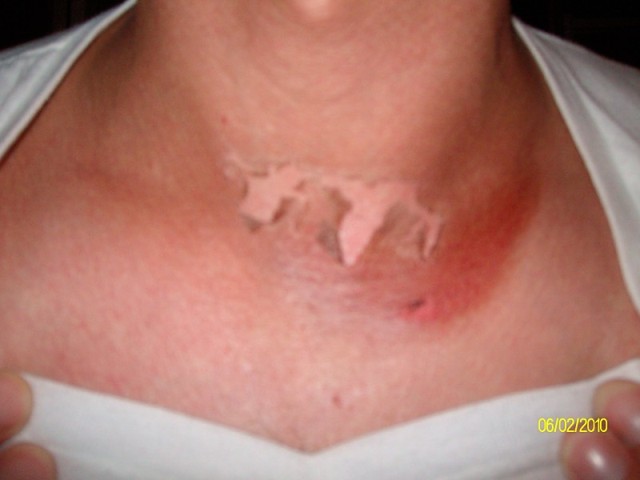
After welding for many years, I can tell you first hand that welding is very dangerous if you are unsafe or reckless. The most common injury is called "flash". I am yet to meet a welder who has not gotten a flash burn. Flash comes from the ultraviolet light that the welding rod creates. Technically flash is UV radiation. It's like getting sunburned on the exposed areas of your body that are not protected.
The worst part is getting flashed from the welding arc light directly into your eyes. It feels like there is sand in your eyes, but in reality it is blisters on your eyeballs, just like the sunburn blisters you get on your skin.
The best part of flash is you don't know it until later that night or day that you got it. Remember going to the beach and that night you realize you will be looking like a lobster tomorrow! Yeah that's it.
Third degree burns happen also and if you get too wet from sweating or rainy weather you will likely get shocked. Additionally, don't weld near anything flammable or you may have a fire or explosion. It is quite common for welders to set their clothes on fire from either sparks or heat. Read the warning labels on your equipment and do as it says!
Weld Joint Preparation
The area that is to be welded should be free and clear of mill scale, rust, oil, water, and paint at bare minimum. Even the best welders who have these substances present will have a weak and terrible looking weld. The big secret the best welders have is they only weld on clean joints! If it’s not clean don’t touch it!
As a rule of thumb you want to grind the weld joint to shiny metal a minimum of 1 inch back. Some jobs require grinding 2 inches back.
I have welded outside, after a rainfall, to finish a job that was moved outside of the shop, and I could not figure out why my weld looked so bad and was so porous. The weld had spots that looked like bubbles popping out! I dried the area, ground it, and thought it was fine. What I did not expect was the heat from welding attracted the water that was hidden below.
So, I poured some water next to where I was going to weld. I was thinking the heat would evaporate the water on the sides and keep the weld area dry. Sounded logical right? Absolutely wrong! I could not believe my eyes! The water on the side was getting sucked into the weld and when I flipped up my helmet the water was going uphill on top of the hot weld!
Lesson learned! Joint preparation is a must and it can literally make or break a weld. In the end, it broke the weld and I had to grind out the weld and start all over.
Stick/SMAW Welding Electrode Designations
Before selecting a electrode to weld with you need to understand what the electrode designations mean. Meaning he letters and numbers on the electrode. Below are two of the most commonly used welding electrodes. The E6010 and E7018.
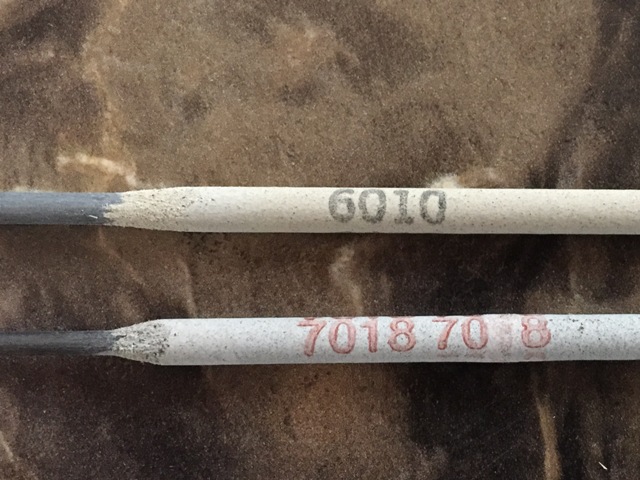
Years ago stick welding electrodes started the designation with the letter “E” and that stood for electrode. These days many rods only have a number on them.
The first two numbers on the electrode refer to how strong the welding filler metal is. A 6010 electrode using the first two digits (60XX) stands for a minimum of 60,000 pounds of tensile strength per square inch of weld. A 7018 is 70,000 pounds of tensile strength per square inch. In comparison, typical steel, which is graded A36 steel, has 36,000 pounds of tensile strength per square inch. The weld is usually two times stronger than the steel it is welding!
If you were wondering what the last two digits refer to, it's the flux or shielding on the rod. The higher the number the more shielding, flux, and or metal is deposited when welding. They add metal powder to the flux to increase the weld deposit rate. A (XX10) has a lot less coating then a (XX18).
Stick/SMAW Steel Welding Electrode Selection Choices
Here is a list of steel stick welding electrodes, what they are used for and what positions you can weld with them.
- 6010 deep penetration works well in all positions and is excellent on dirtier metals. Also used on open root welds.
- 6011 deep penetration works well in all positions and is excellent on dirtier metals.
- 6013 mild penetration works well in all positions and needs a cleaner joint.
- 7018 mild penetration works well in all positions and works best on clean metals.
- 7024 mild penetration works well in the flat positions and needs a clean joint.
For most people the three best electrodes to use are:
- Fixing rusty and dirty metals a E6010 is the best choice. It burns through a lot of junk, welds really welds in all positions and has deep penetration.
- For general all around welding with a single electrode that is easy to use you can’t beat the E6013! It has decent penetration, is very easy to weld with and the weld looks much smoother then the E6010.
- If you have clean metal and want a good looking weld in all position the E7018 is pretty much the industry standard.
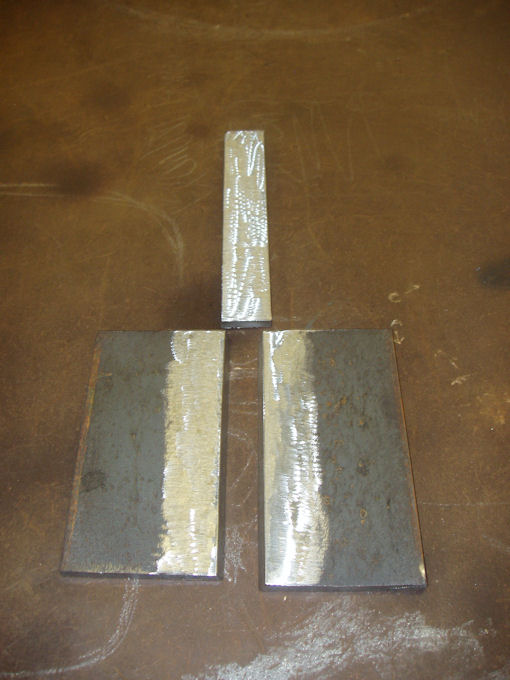
Stick/SMAW Stainless Steel Welding Electrode Selection Choices
Choosing a electrode to weld stainless steel depends on the grade of stainless steel you are welding here are the two most common stainless steel electrodes:
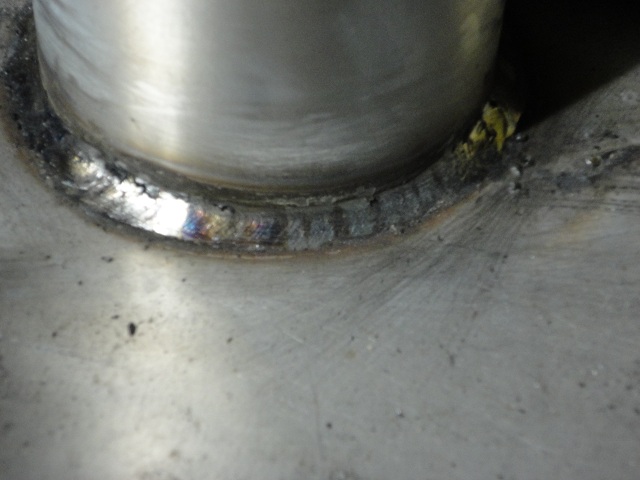
- E308L-16 is the most commonly used. It is used for welding 304 and 304 grade stainless steel. The picture above shows how it welds.
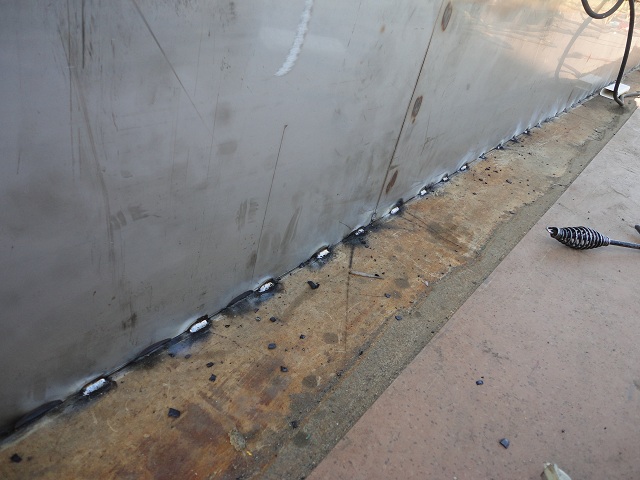
- E309L-16 is used for welding stainless steel to regular steel. The picture below is done with the E309L-16.
Stick/SMAW Aluminum Welding Electrode Selection Choices
Welding aluminum with a stick welder is not very common. If you decide to weld aluminum with a stick welder the material needs to be thick enough to handle the electrode. Stick welding aluminum works best on thicker materials. If you are welding thinner aluminum then say 1/8 inch go with a MIG or TIG welder.
The most common Stick Aluminum Electrode is the E4043 it welds in the flat, horizontal and vertical positions. On thicker metals you also want to preheat the aluminum to at least 500 degrees. Be careful overheating results in the weld area disintegrating and dropping to the floor.
Basic Stick Welding Machine Set-Up
The first steps in welding machine setup is selecting your rod, then set the polarity according to the manufacturer’s recommendation, and finally set the welding machine to the amperage range that the manufactures recommend.
Now you are ready to fine-tune your welding machine to the metal you will be welding. Get some scrap metal that is as close as possible to the thickness of the metal you will be welding. This is important because welding different thickness metals requires different setting. You can compare setting your machine to lighting a match. A match burning will easily heat up a piece of tin foil to make a drop of water sizzle but that same match has no chance of heating up a frying pan to do the same. In this case it's not a match but amperage settings!
The trick is to learning how to setup your welder is to listen to the crackle of the rod burning without looking at it and knowing if the amperage is set right. Strike a arc and use the power setting to dial in to the right sound. The sound of the crackle like eggs frying on a pan that tells you all you need to know. The welding machine should be set hot enough to burn the rod smoothly without sticking, and the rod should not turn cherry red, otherwise the settings are too high.
Once you have the sound of the electrode dialed in you later learn to feel the vibration of the electrode burning and that also tells you a lot about the weld. Finally you do your visual inspection of the weld. Is it smooth, rough, too flat and so on.
Most welding shop foreman who interview welders give them a weld test and know from halfway across the shop by the sound of the weld if that welder will pass the test.
Basic Stick Welding Technique
Before you get started welding – and this is very important – get comfortable, use two hands to hold the handle, and brace yourself in any and every possible way to make sure you are in a comfortable position. This is one of the biggest secrets journeyman welders use all of the time. I was originally thought to weld with one hand and all that means for you is less control. Control is the biggest factor when it comes to welding technique!
How to Strike a Arc?
Getting the arc started is easier said than done. In the beginning, you will find that the rod sticks and the flux will likely chip off and ruin a small part of the rod. It's almost unavoidable and you have to take it like learning to ride a bike. Even the best welders have this happen now and then. To help with striking the arc, if you are wearing the proper welding gloves that are dry, you can lean the rod on the other hand almost like a pool stick and strike it. Once the arc starts you put that hand with the other one on the welding handle.
Another way to strike a arc is to strike the metal like a match. This work well but in the beginning you will likely find the arc starts and you lose it. This comes back to being comfortable enough to control your electrode.
Fixing the chiped flux from failed arc strikes is something you need to learn how to do. To fix any chipped flux, take a piece of scrap metal and strike an arc holding the rod about a ¼ of an inch away from the metal till it burns to a complete and undamaged part of the rod. This is the only time you will want a long arc like that. After you have a good rod again, I find removing the rod from the holder and scraping it on something to remove the used flux helps with restarting the arc later. It gives the metal inside the rod a good contact to strike an arc with much less effort.
Stick Welding Techniques
To start so many new welders are looking for the perfect pattern to weld with and that included myself many years ago.
The perfect welding technique is many hours of practice! Overtime your hands, eyes and body positioning automatically adjust to the weld needed and your patterns change as needed.
Stick Welding Paterns
Here are the three most used welding techniques/patterns:
- Whipping the rod, a moving it back and forth motion.
- Circles to fuse the metal in a circular motion.
- Weaving a side to side motion (for wider welds).
The reason for using a slight motion during welding is becuse it helps spread out the weld more evenly. As a general rule you want the weld to be twice the width of the electrode and no more then 4 electrodes wide. Weave welds can be wider if the job site allows it.
Whipping the Electrode Technique
Whipping works best with electrodes that do not have a lot of flux. For example a E6010, E6011 and E6013 can be whipped because they have very little flux that can get trapped in the weld. It also works well on dirtier weld joints becuse the forward and back moving motion helps burn off contaminates. Whipping works best on thinner metals, fillet welds (where two pieces of metal are joined like a L) and open root welds where the welder welds both sides of a joint from one side.
Circles Welding Technique
Circles are a good beginner welding technique because they can be used with most electrodes and they help control you travel speed. All you do is make a circle that moves slightly forward on each rotation.
Weaving Welding Technique
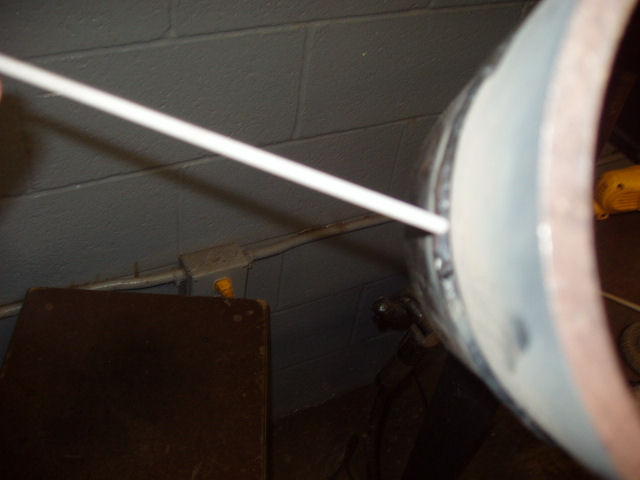
Weaving is typically used for wider welds and can be adapted to narrow ones by using a very small motion. Most welders who have been welding for a long time use a slight side to side motion for their welds and the result is excellent. On wider welds a weave also works very well but some job sides do not allow wider welds. Below is a picture showing how the electrode is held for a weave. All you do is strike a ark and hold one side for a second then move over to the other side of the weld joint and hold it for another second. Keep repeating.
Stick Welding Position Rod Angles
This is another area where the textbook, welding rod manufacturer recommendation and the reality don’t match.
Below are rod angles and travel directions that most people follow. After welding long enough you can make any rod angle work! I typically point my rod directly into the center of the joint. If I am welding in a very tight space I use angles that are not supposed to work. For example welding a pipe 2 inches from a wall. There is no way to have the proper rod angle in some areas. I also pass x-ray tests with these forbidden rod angles and had no problems. It all comes naturally with enough practice.
Overview Of Rod Angels and Positions
- Flat or 1G you drag the rod between 10 to 30 degrees in the direction of your movement.
- Horizontal or 2G you point the rod upward between 30 and 45 degrees and drag it toward your direction of travel with a side tilt of 10 to 30 degrees.
- Vertical up or 3G point the rod up between 30 to 45 degrees.
- Over head or 4G is the same as flat or 1G except the rod is pointed up.
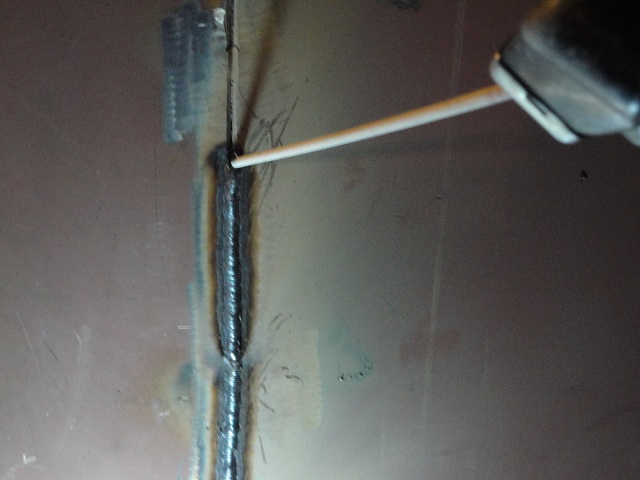
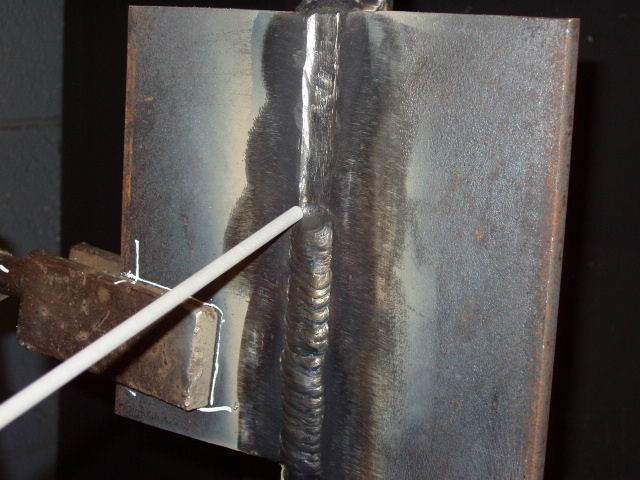
Flat Welding Electrode Angle
Below is a picture showing the proper rod/ electrode angle for welding in the flat position. In this example the rod is traveling from left to right with a slight tilt in the direction of travel dragging the electrode.
Horizontal Welding Electrode Angle
In this example of welding horizontal you want the electrode pointing up 30 to 45 degrees with a slight tilt into the direction of travel. The travel in this picture is from left to right.
Vertical Welding Electrode Angle
When welding in the vertical position there are two ways to travel. Vertical up and vertical down. They both have the same rod angle except vertical down works with the E6010, E6011 and E6013. The other electrodes like E7018 have to much flux and typically stick in this travel direction and get slag caught in the weld. Vertical welding is done with the electrode pointing up 30 to 45 degrees like in the picture below.

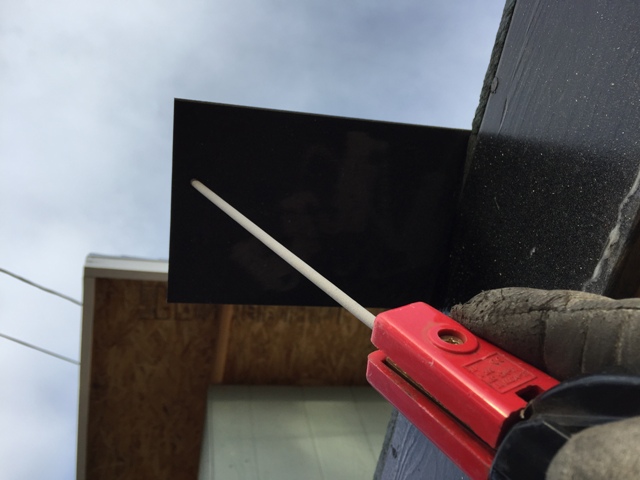
Overhead Welding Electrode Angle
Overhead welding is just like flat welding. You drag the electrode into the direction of travel between 10 to 30 degrees. On a side note overhead welding is no different then flat welding. It overcoming the mental block! Below is a picture of the overhead electrode travel angle going from left to right.
Defying Electrode Angle Rules
Below are two pictures I of weld I did dragging uphill instead of pointing my electrode up. The trick with changing your electrode angle is once you build a small shelf of weld then you can roll the arc of the electrode to travel any way you want.