MIG Welder Settings!
How to Setup a MIG Welding Machine to Weld
Before setting up your machine you need to prepare and research a few things before squeezing the trigger to striking an arc. Most of the weld quality relies on MIG welder settings or machine set-up and proper preparation. Before setting up you machine you need to get the answers to:
- What Type of Metal Will I Be Welding?
- What is the Metal Thickness That I Will Be Welding?
- How Will I Prepare the Joint?
- Do I Have The Right Gas and Electrode/Filler Wire?
- How is the Welder Set-Up?
- Where Can I Find a MIG Welder Setting Chart or Who Can I ask for Advice!
What Type of Metal Will I Be Welding?
The type of metal that will be welded has a big impact on the machine setting, electrodes and gasses that will be used. Different metals have different melting temperatures and hold that heat differently. When setting up you MIG welder you need to know exactly what type of metal you are going to weld. There is no single setting that works on every metal type. The three most commonly MIG welded metals are:
- Carbon Steel/Commonly Designated as A 36 Grade
- Stainless Steel/Nickel Based Alloys
- Aluminum/Non Ferrous Metals
What is the Metal Thickness That I Will Be Welding?
The thickness of the metal has a major impact on the machine settings. When it comes to other processes like Stick or TIG welding you can use almost the same setting for a variety of metal thicknesses. For example you can weld ¼ in thick plate with the same setting used to weld a 1" inch thick plate and so on.
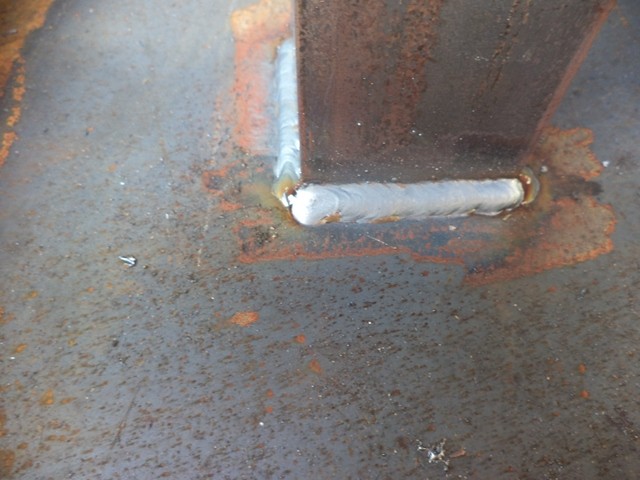
Now MIG welding on the other hand does not work this way! The heat settings vary greatly depending on the metal thickness. The biggest danger from a weld quality stand point comes from using too low of a heat setting. For example; in the Nuclear Power Plant building industry, MIG welding is almost banned. This happened because in the past there were many welders who did not use enough heat and ended up welding joints that did not penetrate at all. The weld looks fine but a few taps with a hammer and the joint falls apart. Even a proper spot weld would be a lot stronger! MIG welding too cold will put in the weld, but it is only laying on the surface of the joint. To cold of a weld is as useful as duct taping the joint.
How Will I Prepare the Joint?
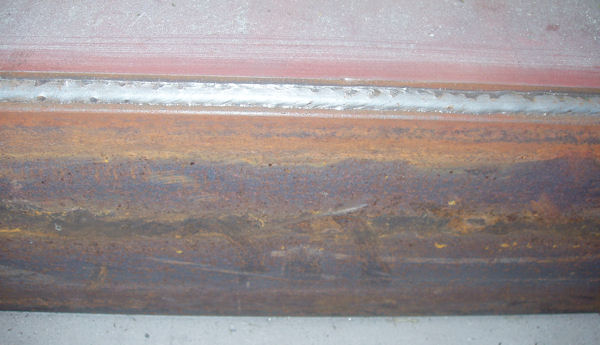
Machine set-up only works right if you have a properly set-up joint. Ideally you want all rust, paint, oils, dirt's and mill scale removed from the weld area. This is done for three reasons:
- The first is a clean joint produces a clean weld.
- The second is that the machine settings will vary between dirty joints and clean one.
- Finally a dirty joint will spatter and spit increases the chances of you getting burns or starting a fire.
Do I Have The Right Gas and Electrode/Filler Wire?
A major part of setting up your machine is choosing the right gas and filler wire/electrode. This is an area that varies depending on all of the above factors and many more. The three most commonly used gas/ electrode variations or combinations are:
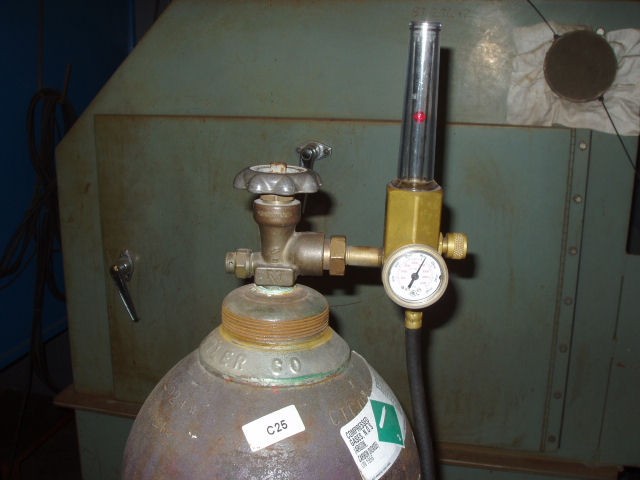
- Carbon Steel – ER70s Electrode with a C25 Gas (75% Argon and 25% Carbon Dioxide)
- Stainless Steel – ER308L with a C2 Gas (98% Argon and 2% Carbon Dioxide)
- Aluminum – ER4043 with 100% Argon gas
How to Set-Up a MIG Welder?
There are three settings or controls that set the welder and those three are:
- Voltage
- Wire Feed Speed
- Gas Flow Rate/Gas Type or Mixture
These three settings are what control the heat of the weld and depending what gasses are used the transfer type too. If you are not familiar with transfer types then please read up on MIG Welder Transfer Types because they have a big affect on your settings and how you will be welding.
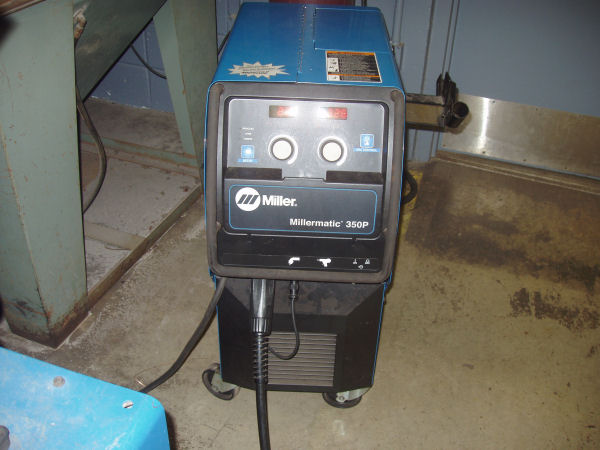
Newer machines like the MillerMatic 211 below no longer need to control wire feed speed and voltage. You just turn the dial to the thickness you want to weld and tweak it from there. The machine does everything but regulate gas flow.

Voltage Settings and Polarity Type
To start the voltage type used is almost always D/C electrode (+) positive. This means that the handle is the positive side of the circuit, or it may be said, the electricity flows from the metal in to the welding handle. This setting almost never changes and if you do need to change it then you need to unbolt the internal leads and flop them.
The voltage is the main heat setting that get's changed depending on the joint, metal thickness, gas type and position of the weld. It does most of the regulation and is most commonly used to change the welder's settings. The voltage setting varies depending on what size electrode is used, how thick the metal is and what type of gas is used. Since MIG welders are CV or Constant Voltage power sources, the voltage does not fluctuate very much when welding.
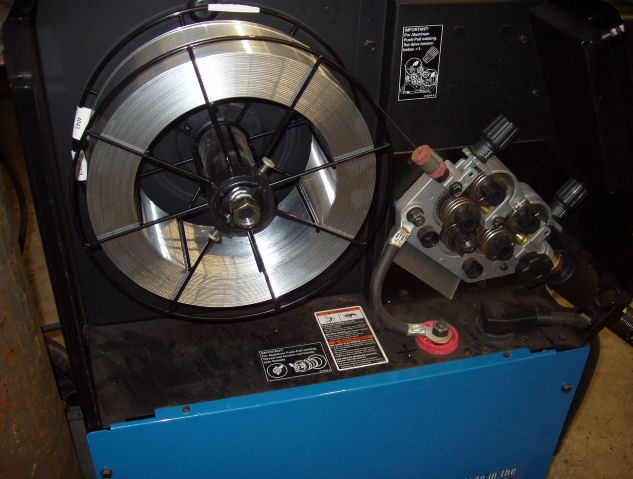
Wire Feed Speed
The wire feed speed regulates how much or how fast the wire is feed into the weld joint. Wire feed speed is regulated in IPM or Inches Per Minute. The wire feed speed also serves another purpose for regulating the amperage. When Stick or TIG welding, the main setting is amperage, but it is the voltage that fluctuates depending on the arc length. With MIG it is the voltage setting that stays the same but the amperage is changing depending on the wire feed speed and electrode stick-out. Picture this; the faster the wire is feed into the joint, the better contact it has. The better contact, the more amperage gets through the wire and the higher the heat.
Gas Flow Rate/Gas Type or Mixture
Finally the gas type and gas flow rate help regulate the transfer type. A high percentage of Argon or Helium added to a mix creates a hotter arc. The main goal of the gas setting is to provide enough gas to shield the weld area from the air. Gas flow rates are regulated in CFM or Cubic Feet Per Minute. This is an area that requires experimentation. In a shop setting a rate of 15 CFM may be enough, but a drafty area might require a rate of 50 CFM. Another thing to watch for is not to have the gas setting to high. A flow rate that is too fast can cause turbulence and suck in air to contaminate the weld. Having the right gas flow rate is a trial and error process that is ultimately a search for a happy medium of all settings in the current welding conditions.

Putting the Voltage, Wire Feed Speed and Gas Flow/Gas Type All Together
Finally once these settings are all put together it produces the transfer type we wanted and it has enough heat to properly penetrate the metal without burning a hole through the joint. It is the result of trial and error that experimentation ultimately sets the machine just right to produce the weld we need, want or hope to make. That all sounds fine unless a welding engineer or procedure has done all of that work for you. If not, then it is time to look at the next section; MIG Welding Charts, Settings and Guides.
MIG Welding Charts, Setting Guides and Exact Answers
Finally if you need some exact answers and guidance then you can read this! The manufactures of most welding machines include either a MIG welding chart inside of the machine or a guide to their machine settings. I do want to mention that two identical welding machines that are made by the same company at the same time never run the same. These are only guidelines and do change from machine to machine! Each machine is calibrated differently and that all depends on its use and who has serviced it.
MIG Welder Settings Charts, Guides and Tables for Steel, Stainless and Aluminum
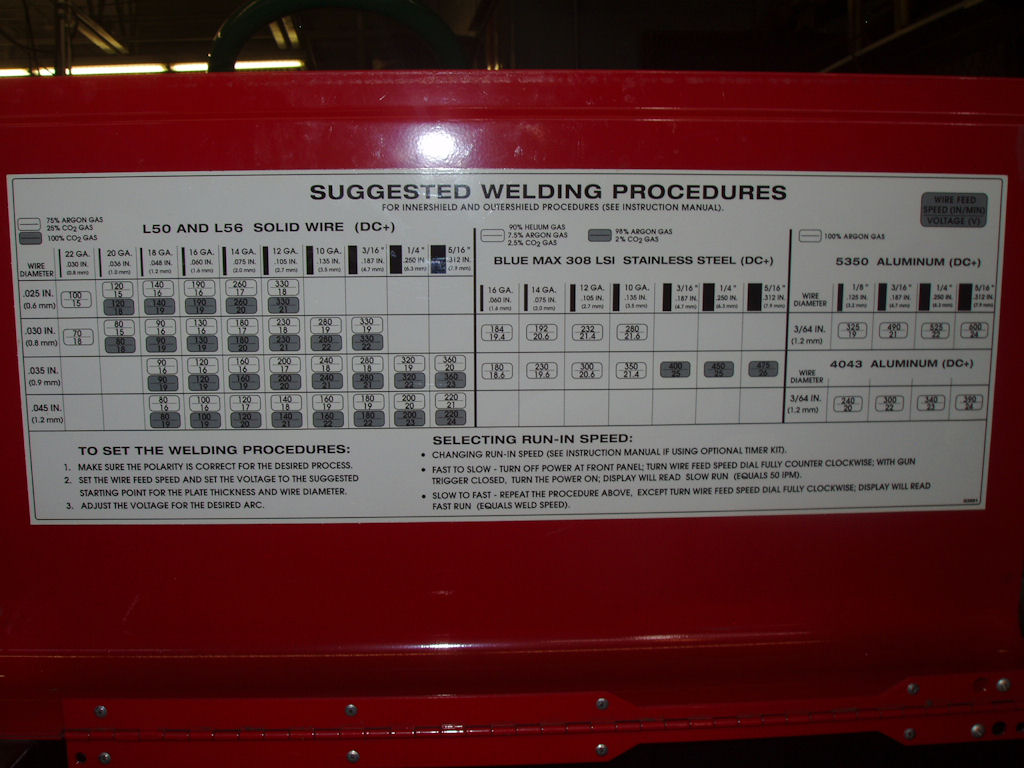
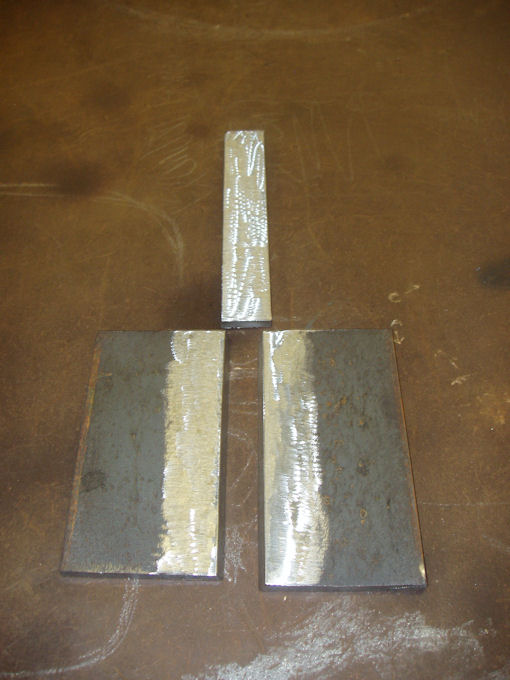
To start the pictures above and below are the manufacturer’s recommended (Lincoln Welders and Miller Welding Equipment) voltage, wire feed speed settings and gas recommendations. After those pictures I have added a chart of my own settings (working on it) that are the happy medium of the manufacturer’s recommendations. Just remember these are just guidelines and each machine runs differently. This is a game of trial and error that requires just that, trial and error! Test your settings on a piece of scrap metal that is very close to the thickness of the metal that you will be welding. It should also be set in the position that you will be welding in. If you take your time following these steps then you will have a much easier time welding!

A Special Note to Student Welders Learning How To Set Your MIG Welder
You need to learn how to SET YOUR OWN MACHINE PROPERLY!Don't expect the student in the next booth to do your job or someone who welded on that machine before you! It is easy to come to a machine that is set up properly and take over! Most jobs do not let you do that! Picture this; you drive 10 hours and blow at least $400 to take a weld test! Now you might have some serious skills, but…. Oh, Oh! You have no clue how to set up your MIG welder! You will not only fail your test but also lose the money you spent to get to job site. Companies want real welders that understand their craft! You need to practice setting up many different welders for different types of welding.